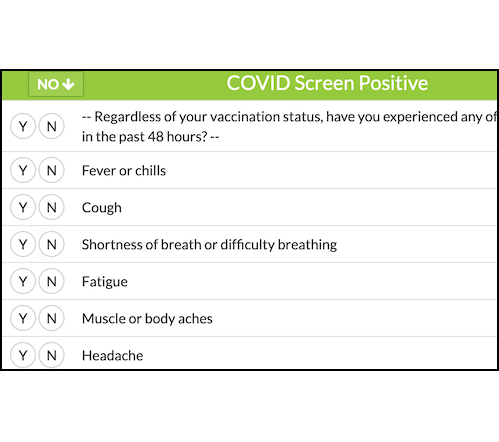
If your triage nurses are scheduling an in-person visit, do they ask a series of COVID-19 screening questions? If so, you can incorporate this screening process into ClearTriage by creating your own COVID-19 screening protocol. Here’s an example of what a COVID screening protocol might look like:
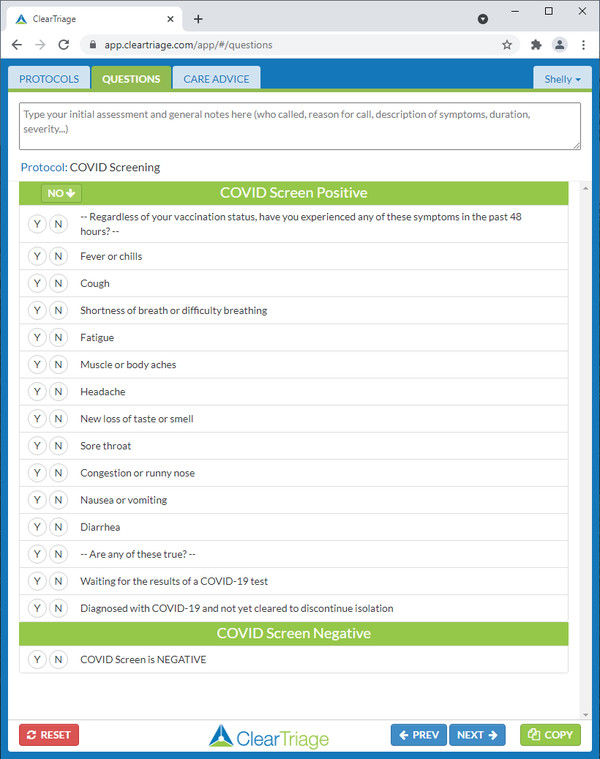
And here are the four steps needed to create a protocol like this:
- Request the creation of a new protocol in your account.
- Add two new dispositions (the positive and negative screening outcomes).
- Add your organization’s screening questions to the new protocol.
- Have your nurses use the new protocol.
Let’s work through the details.
Request the Creation of a New Protocol in Your Account
You may already know that you can customize any of the standard protocols in your account without having to involve the staff at ClearTriage. If not, click here to learn more about basic protocol customization.
However, for this project you will be creating your own protocol from scratch rather than customizing an existing protocol. To do this, you will need to provide some basic information to us so we can create a new empty protocol for you. You will then use the standard customization tools to add the screening questions into this new protocol.
The basic information we need includes the title of the new protocol and the information you want to have displayed when the nurse clicks on that protocol. Provide that information by filling out this document and emailing it back to support@cleartriage.com.
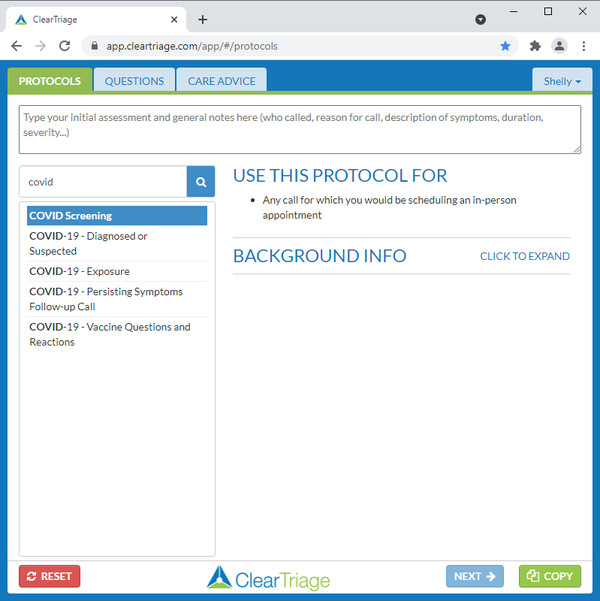
Here is what the protocol would look like immediately after we create it. It won’t have any screening questions yet, but it will show up in your protocol list.
Add Two Dispositions
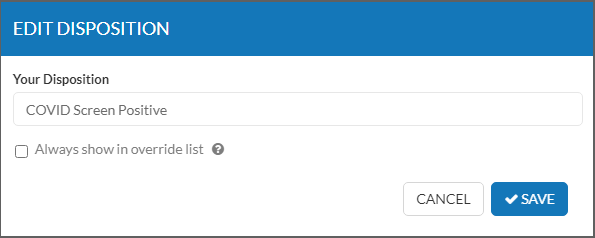
Now you need to add the screening questions into your new screening protocol. Start by going into the Customization section of ClearTriage and click on Dispositions to edit the dispositions. Then select “Add a Disposition” at the bottom of the green section and add “COVID Screen Positive” and “COVID Screen Negative” or something similar.
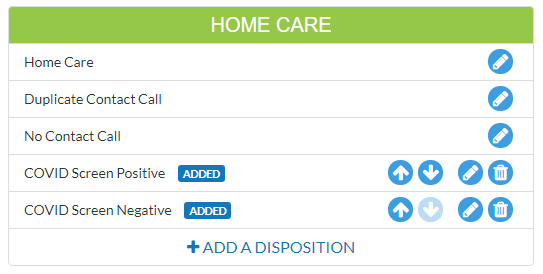
You don’t want these new dispositions to show up in the override list so be sure to uncheck “Always show in override list” when you create them.
Add Your Screening Questions
Now you need to edit the protocol itself. Click on Protocols in the Customization section on the left, then find and select your new screening protocol. Click on Edit Questions to get to this screen:
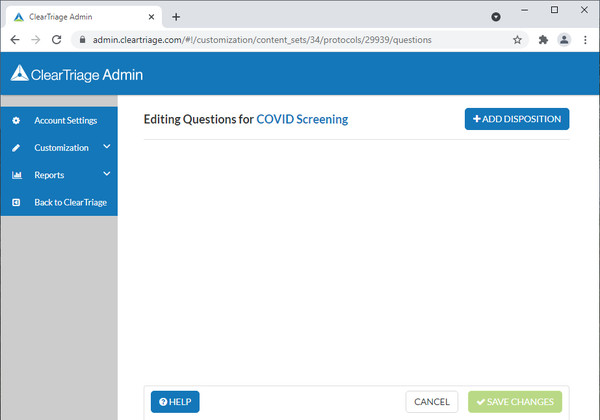
Note that there are no dispositions yet in this protocol. Click the Add Disposition button in the top right and add your two new COVID Screening dispositions.
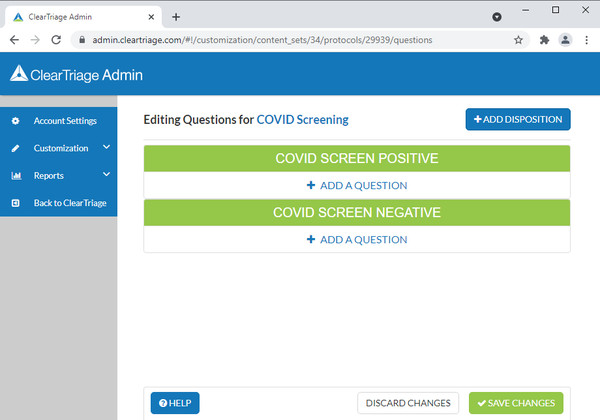
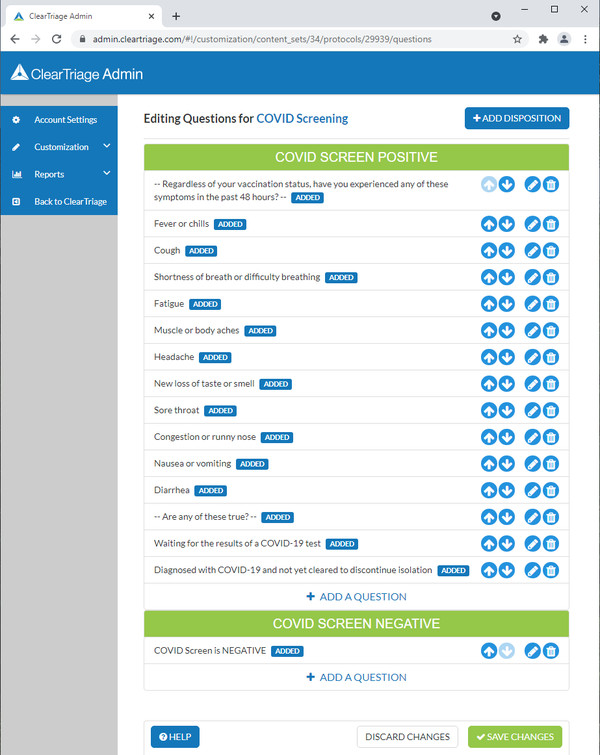
Now you’re ready to click on Add a Question under the positive screening disposition and add in all of your organization’s screening questions. Once those look the way you want them to, add a “COVID screening negative” question under the negative disposition to give the nurse something to select if all of the screening questions were negative. Your protocol should look something like this:
Save your changes, then go back to ClearTriage and give it a try.
Use the New Protocol
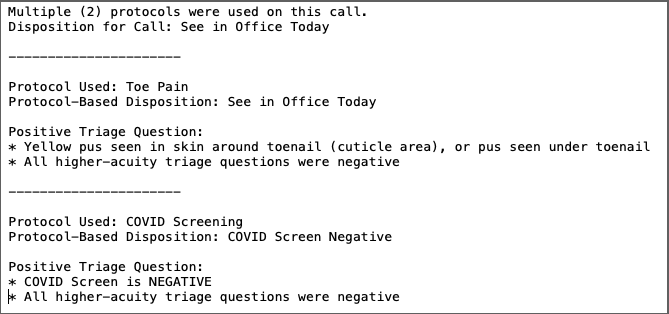
In general, your nurses should continue to use ClearTriage like they currently do. But if a call results in scheduling an in-person appointment, they should go back to the protocols tab and select your new COVID screening protocol (so that protocol and the original protocol will both be used in this call). They can then ask the COVID screening questions which will document whether the screening was positive or negative. If negative, they can go ahead and schedule the in-person appointment. If positive, they can instead follow your organization’s procedures for caring for that patient.
Here’s what a triage note using the COVID screening protocol might look like:
Need Help?
We hope this gives you the information you need to create a COVID screening protocol for your nurses. But please contact us if you have questions or need help implementing this idea. ClearTriage is a powerful tool, we’re always available to brainstorm possible solutions to your triage or screening needs.

